Sunday, November 2, 2014
I'm Ready for the Gym!!!
I am so ready for the gym. Nothing like a pretty water bottle to motivate you...tee hee. I used permanent vinyl and of course my Pazzles to create this monogram. I swear I monogram EVERYTHING! No lie..lol I created the letters using the video in the Pazzles Craft Room, How to Make Round Monograms. I added a circle around the monogram and then a bow to top it off. I love the way it turned out!
Wednesday, October 29, 2014
Sunflower Bouquet In a French Tin Vase
I love the fall and the sunflowers it brings with it! Every year the pumpkin patch has Sunflowers in large tin French vases that you can buy by the bunch. I just inhale and drink in their original scent. I decided to create a paper bouquet and french tin so I could have my flowers throughout the entire fall season. You can find more information, the files I used and the instructions here!
Saturday, October 11, 2014
Baby Shower Party Favor
I made these party favors for a friend's baby shower. First I printed the baby's name on lightweight card stock then I cut the paper into 4x6 rectangles. Next I applied glue to the short end of the rectangle and folded it so it overlapped a little then just pressed the rest of the envelope down. then I applied glue to one of the open edges of the treat bag and ran it through my crimper (about 4 turns should do it) I added the treats. In this case M&Ms and then repeated the gluing and crimping on the other side of the envelope. I printed the baby's monogram and used my Pazzles Vue and the print and cut method to cut it out. I also cut the doily out on my Pazzles Vue. I wrapped a strip of paper around the envelope and then glued it together on the edge of one of the short ends just so it overlapped a little bit. Then I attached the other elements to it and glued it to my treat packet. This party favor can be tailored for any event and they are very easy and economical to make.
Sunday, October 5, 2014
WORLD CARD MAKING DAY CARD BUNDLE SALE!!!!
What and INCREDIBLE deal!!! $5 dollars?! Now is the time to buy folks!! This deal will be available until midnight (mountian daylight time) so scoop it up now! Its available in WPC, AI, and SVG formats, all come with PDF instructions. Just click the picture and it will take you to the link to make your purchase! Very Nice!
Friday, September 26, 2014
WORLD CARD MAKING DAY PARTY!!! WHOOT WHOOT!!!
World Card Making Day Schedule
We hope you will join us for a day of fun as we celebrate World Card Making Day! Any day that celebrates paper is a holiday worth having a party for! We’ve got a party planned, so clear your calendar and join us.
Free Cutting Files
Free Cutting Files
- Starting at 11 am (MDT) and running through 3pm (MDT), we will be posting cool card techniques and free cutting files every hour on the hour here on the blog. Come learn something new and grab your free files. The files will be free for everyone to download and will be offered in WPC, AI and SVG format, so anyone with a digital cutter can play along. We’ll have several chances to win some prizes as well.
- The party will be from 11am to 3pm Mountain Daylight Time (MDT). You can use the World Time Converter to check the time for your area.
- Craft Room Members and free forum members can join us in the Member Chat area for extra fun and games (and more prizes). Chat with Klo and Michelle, get to know one another, and play games for extra prizes. If you are not a Craft Room member be sure and register for a free forums account before next Saturday so you can play along.
- At 2pm (MDT) Pazzles Educator Klo Oxford will be teaching a live class on a fun card making technique. Click here to go to the Classroom page with instructions on how to enter the live classroom. The classroom will open shortly before 2pm (MDT) and stay open for a while after the class so you can share the projects you’ve created throughout the day with one another.
- Help us spread the word about our WCMD activities by sharing with your friends. Use the social media buttons at the bottom of this post to tweet, share, pin and email this event to all your paper friends!
Saturday, September 20, 2014
Mad Hatter Tea Party Invite!
My niece just had her wedding shower this month and asked me to create an invitation for her. The shower was Mad Hatter Tea Party themed. Of course I said yes, and this is what I created for her.
Of course I used my Pazzles Vue to make of the awesome print and cuts! The new optical eye really makes the process quick and easy!! The majority of the files I used came from the Pazzles Craft Room. Check the Craft Room offers THOUSANDS of cutting files at your fingertips.
Coffee Cup gift box and Gift Card Holder
Is it morning yet? Or should I say is it coffee time yet? Ok really, when is it not coffee time?
This coffee cup box and gift card holder set would make a perfect gift for anyone on your list who likes coffee. You can fill the cup with biscotti or coffee flavored candy, specialty creamers or really any treat your recipient enjoys. I plan on giving this set to my husband, for a just because gift.
I used a wobble spring to attach the coffee cup so it jiggles when you tap it.
This coffee cup box and gift card holder set would make a perfect gift for anyone on your list who likes coffee. You can fill the cup with biscotti or coffee flavored candy, specialty creamers or really any treat your recipient enjoys. I plan on giving this set to my husband, for a just because gift.
I used a wobble spring to attach the coffee cup so it jiggles when you tap it.
Thursday, August 28, 2014
Pazzles Project Patterns....WAY COOL!
One of my favorite features in the new Invue software is the Project Patterns! Take a look below and see what this amazing software and machine can do!!!

One of the cool new features in the InVue software is our new Pazzles Project Patterns. You have to see this in action to understand the full possibilities, but let me assure you-it is awesome! The InVue software comes with four Project Patterns and we will be adding more each month. Essentially you open a Project Pattern and you see a sketch (layout or card). Several pieces of the sketch are “replaceable”. You click on the replaceable shape and then select a predesigned coordinating image from a drop down menu. The image automatically replaces the selected shape and resizes the new shape to fit perfectly. Here is an idea of what can be done. When you open the project it will look like this:

All four of the lettered shapes are replaceable. You click on one of the letters and it will be highlighted in red.
In this case, I have selected A and you can see my replaceable shape is red. I now look over to the tabs on the right side of the page and find the A tab. I simply click on which ever image I would like to use and the software places it in the correct position for me.
After replacing the four replaceable pieces with images I have this, a complete layout.

You can mix and match the pieces for endless combinations.
Today we have a brand new Project Pattern for you, a two page Baby Layout. For those of you using the InVue software, simply download the zip file and extract the files. Next locate the Pazzles InVue software file on your computer. Within the File Explorer (not the software) locate Pazzles>Images. Copy the entire Baby Book Layout file into this location. When you open your InVue software and select File>Open Project you will now see the Baby Book Layout as one of your project options.
One of the cool new features in the InVue software is our new Pazzles Project Patterns. You have to see this in action to understand the full possibilities, but let me assure you-it is awesome! The InVue software comes with four Project Patterns and we will be adding more each month. Essentially you open a Project Pattern and you see a sketch (layout or card). Several pieces of the sketch are “replaceable”. You click on the replaceable shape and then select a predesigned coordinating image from a drop down menu. The image automatically replaces the selected shape and resizes the new shape to fit perfectly. Here is an idea of what can be done. When you open the project it will look like this:
All four of the lettered shapes are replaceable. You click on one of the letters and it will be highlighted in red.
After replacing the four replaceable pieces with images I have this, a complete layout.
You can mix and match the pieces for endless combinations.
Today we have a brand new Project Pattern for you, a two page Baby Layout. For those of you using the InVue software, simply download the zip file and extract the files. Next locate the Pazzles InVue software file on your computer. Within the File Explorer (not the software) locate Pazzles>Images. Copy the entire Baby Book Layout file into this location. When you open your InVue software and select File>Open Project you will now see the Baby Book Layout as one of your project options.
Saturday, August 16, 2014
Even Countdown Frame
I made this project using a plain frame and some vinyl. I cut the square, the brackets and the words Days Until out of vinyl and adhered them to the top of the glass. Then all you have to do it write the number of days till your event in the box and then the event name at the bottom using a dry erase marker. You can change the background paper to match your upcoming event. Easy peasy. I have mine sitting on the end table in our living room and the kiddos love changing the dates and it eliminates the mom," how many days till" questions...lol
Monday, July 21, 2014
THE VUE IS COMIN,G THE VUE IS COMING!!!
Ok so if you were on the fence about whether or not to get the new Pazzles Vue. Let me enable you!! Just look at this picture that Klo posted on the Pazzles Fans Facebook page! The stars are as tiny as can be and look how they cut!!! Wowzers!!! I cannot wait to get mine in my hot little hands!!! It comes in four different colors to choose from and you can order it for $99.00 with a two year $20.00 a month craft room commitment! Easy peasy!!! You can check out all the specks here.
Friday, July 18, 2014
Easel Card Cutting Collection

Aren't these easel cards great!!! All they need is a little personalization and they are good to go! I think they are super unique and something the recipient would love and be surprised by. I think the tipple easel card would be great to attach pictures on either side of the middle easel and then a special note written on the middle easel. What grandparent wouldn't love that?
You can get the cutting files in SVG or WPC here on the Pazzles Craft Room Blog!
Polymer Clay Pendants
I am so excited about this project! I made these pendants using the Pazzles Pastry Tool, Pastry Mat and polymer clay. Just like all other types of mediums you cut on your Creative Cutter, the possibilities are endless! It’s amazing the detailed cuts you can get using clay! To get started, watch Klo’s Polymer clay video for some fabulous instructions. It is in the January 18th – 21st Marathon classes, sessions 10 & 11. The files I used are found in the Craft Room Library and are listed at the end of the instructions.
All the instructions and additional tips and tricks can be found on the Pazzles Craft Room Blog.
Hello Friend Pop up card
I just love this pop up technique! It just brings a whole new element of fun to your card and its very easy to do! I followed the directions in the video for the basic pop up cards video on the Pazzles Craft Room blog. It was really fun to make and pretty easy too!
Monday, June 16, 2014
Vinyl Resist Painting
I made this canvas painting using Pazzles Removable Vinyl and paint. I love this scripture and its perfect for me and the hubbs, because its true!! It will be hung in our bedroom over our bed. You can find the instructions and the FREE files here in the Pazzles Craft Room. I think it would make a great and inexpensive wedding gift!
Thursday, June 12, 2014
Father's Day Jiffy Pop Card
I made this card by dressing up a Jiffy Pop. The hubby loved it! The instructions and cutting files can be found here in the Pazzles Craft Room. It was fun to make and the kiddos and the hubby had a great time popping it!
Friday, May 23, 2014
Father's Day Tie Box
Here is a tie box I created for the Pazzles Craft Room. Its the perfect box for a non-tie gift! You can get the file in the Pazzles Craft Room.
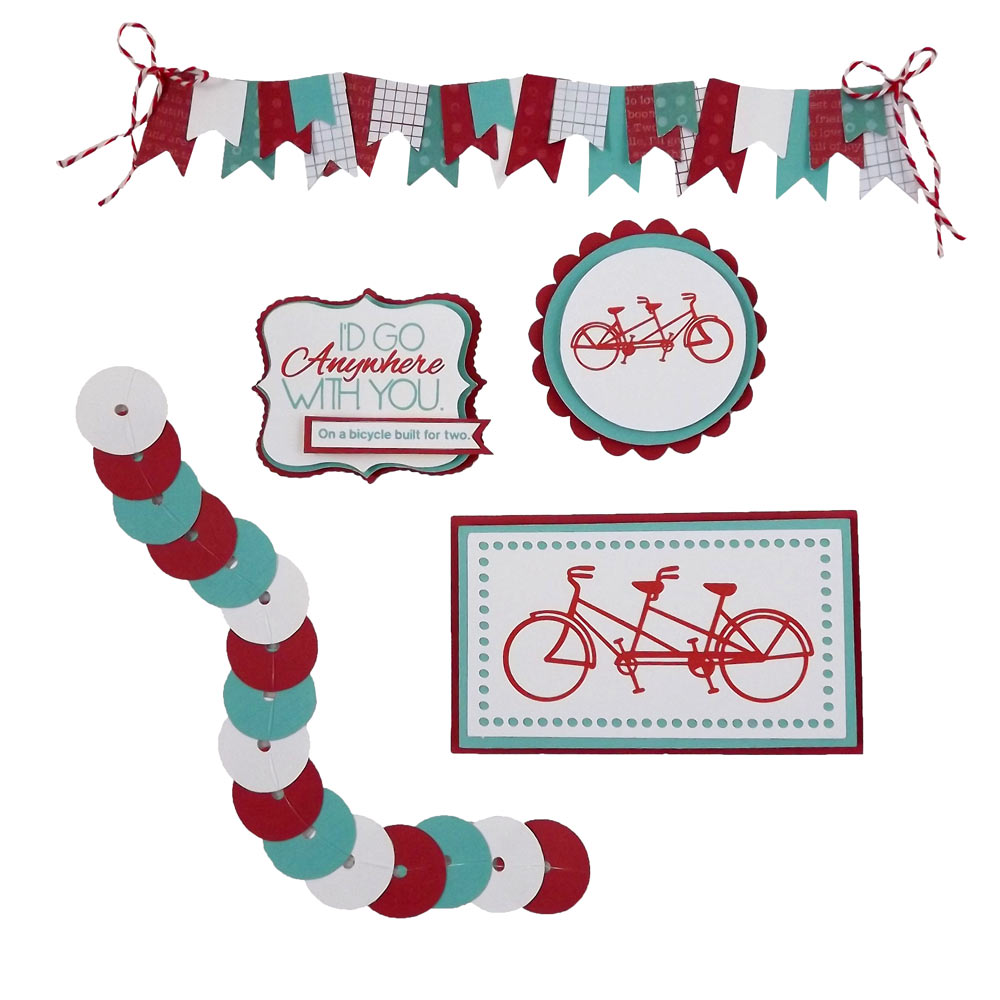
Embellishment Pack
I love to bike ride. It’s so nice to breathe the fresh air. It makes me feel so carefree… until I have to pedal up a steep hill! I have always loved the novelty of tandem bikes and wished I had one…so someone else could pedal! I made five different embellishments to help me savor the feeling I get when I ride my bike! I hope they will inspire you and help you get your scrapbooking page or card put together in a snap. Though I chose a bike theme, these embellishments can be turned into any theme you can imagine. Instead of using the quote, “I would go anywhere with you. On a bicycle built for two”. You could say “If friends were flowers, I would pick you”. Then change the pictures of the bicycles to pictures of flowers. For the cutting files and instructions just go to the Pazzles Craft Room.
Monday, May 19, 2014
New Pazzles Invue and Pro 2014 software
This is going to be fun and exciting class. I will be showing you some of the features that are currently in the InVue software that will be in the box of every new Inspiration Vue machine when it ships. I will also be showing you some highlights of the Pro 2014 software that is going to be available as an optional add on to your Inspiration Vue for $50.00 (or buy outright for $60.00)
Join us starting Sunday Morning at 5am, 1pm and 7pm (all times are USA Central, Chicago Time). If you are not sure what time that is in your location, go to the World Time Conversion site to see what time you will join us.
I was blown away with both software offers but I must say I lean towards the Invue as it seems to be a little more user friendly and has some great features in it! That being said there are a few features I can see myself using over and over in the 2014 pro, and since I am already comfortable with the 2010 pro the new features in the 2014 pro are a big plus. I can see myself switching back and forth between the two on a lot of projects, pulling features from both.
If you haven't seen the video comparison of both softwares check it out here!
http://www.pazzles.net/wordpress/klos-classroom-archives
Tuesday, May 6, 2014
MACHINE EMBROIDERED CANVAS
I made this for one of my daughter's teachers who is a photographer in addition to being a teacher. I made it with a couple of files I purchased from Urban Threads...love that site!
I took the canvas off the frame by removing the staples on the back. I did not hoop my canvas as I thought it would leave hoop marks even after re-stretching it back onto the frame. So I printed out my design from my embroidery software, cut it out and sprayed the back with Dritz Basting Spray. I centered it on the canvas and gently adhered it. Then I loaded my hoop with tearaway stabilizer. If you decide to do a denser stitch out I would us leave-in stabilizer. I haven't tried to stitch out a more traditional embroidery on canvas yet. I plan on trying it, but I wonder if the canvas will pucker or even support the denser stitching. Not sure, I will find out. Once I hooped my tearaway I sprayed it with Dritz Basting Spray and loaded it onto my machine. Then I took my canvas with the printed version of the design adhered to it and put the needle through the center cross bars of the print out. I made sure my canvas was straight and then pushed down on it gently to adhere it to the stabilizer. (Honestly, I use this technique every time I embroider. I never hoop my projects) Then I just hit go and it went...lol. It stitched out perfectly without a hitch. After the design was done stitching out I removed the hoop from the machine and cut all my jump stitches. Then I simply used an electric staple gun to re-wrap the canvas around the frame. It was easy, as the fold lines were already in place and I used the previous staple marks to re-staple. I think it turned out great! I am making a bicycle one for my daughter's room next!
Thursday, May 1, 2014
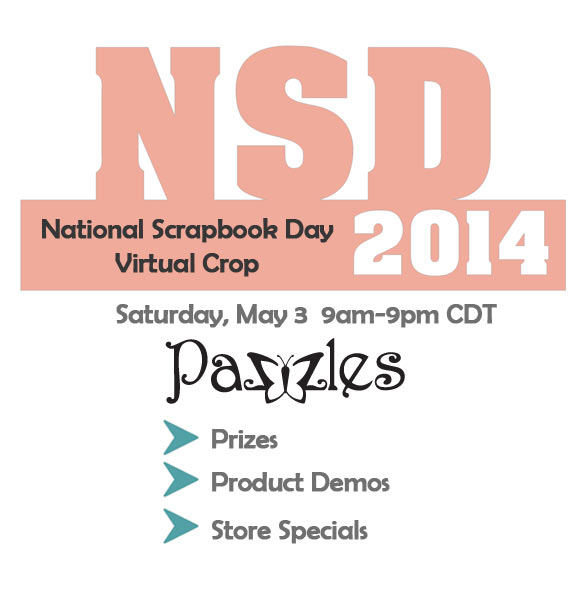
NATIONAL SCRAPBOOKING DAY!!!! WOOT WOOT!!!
Saturday, April 12, 2014
Duck Pull Toy
I made this duck pull toy with my Pazzles Creative Cutter. I used Spellbinder's files found in the Pazzles Craft Room. I was thinking a baby shower center piece or an Easter basket. It would even work for a first birthday. It was fun to make and pretty easy too.
Thursday, April 3, 2014
SPELLBINDERS LAUNCH PARTY!!!!
Wanna have some fun?! Come join us for the Spellbinders Launch Party for tons of fun, great projects and a Huge Spellbinders Giveaway!!! I'm tellin' you, you won't want to miss it!!
Spring Prom Paper Boutonniere and Corsage
Are you going to the Prom? Or maybe a Spring Fling? I made these totally out of paper using my Pazzles Creative Cutter and files from the Pazzles Craft Room.
I am really lovin' the yellow and grey combination lately. Believe it or not they are not that difficult to put together. And just think. Your flowers will still look fabulous at the end of the night while others are wilting.
Monday, March 17, 2014
PI Day Projects
I know, I know...another bleach resist shirt? I mean really how many can one person make?!...lol Buuut, my darling daughter told me on Friday night that she needed to do a PI Day project and it was due on Monday. I know PI Day was on Friday the 14th but they had a teacher work day, so they celebrated it today. Since bleach resist is such and easy thing to do; I suggested we make a shirt. We also took mini Moon pies and used hand sanitizer to remove the "e" from the word pie so she had 24 Moon Pi's. She was happy with both projects and her class mates were very happy to get their Moon Pi's...lol
Thursday, March 13, 2014
Space Week
We had space week at my kiddos school this week and every teacher was assigned a planet. I made these shirts for them using vinyl and my Pazzles Creative Cutter! They loved them! I also made the sun and the moon but they went home for the night...lol We had a Space Jam tonight and they all wore their shirts. It was a blast!
Sunday, March 9, 2014
Its a Party!!! WOO HOO! Who doesn't like parties?!
Don't forget to attend the new Pazzles Vue launch party!! Expect lots of fun and prizes!!! Hope to see you there!
Wednesday, March 5, 2014
ITS HERE!!! ITS HERE!!!
I can hardly wait to get this baby in my hands!!!
Inspiration Vue™ Pre-Order Information
We’ve answered a few of your burning questions in our FAQ post but we know you are excited and want every detail. Keep reading to the bottom of this post for details on a pre-launch party Monday March 10.
Precision Print And Cut
The Inspiration Vue features a new optical eye to make Print And Cut projects easy and accurate. Our revolutionary new system scans the actual page to determine cutting placement. It is not necessary to use registration marks, thus reducing paper waste. Registration marks can be turned on for enhanced accuracy, or for those who prefer registration marks. The result is accurate cuts around images you have printed on your home computer.
Mac and Windows Compatible Software
The new InVue design software will be shipped in the box with the Inspiration Vue machine. You’ll find several fun features within the software suited for Print and Cut designs such as a slider to set color transparency, and transparent PNG importing. The InVue software will allow you to open SVG or WPC files directly onto your page and then save them directly to a SVG or PVG (Pazzles file type) file. One of the most exciting features of the InVue software is that it will be fully integrated with the Pazzles Craft Room so it will be easy to access your downloaded files. Initially the InVue software will be available with the machine, but it will be available for purchase as a stand alone product as well. The InVue software will work with both the original Inspiration and the Inspiration Vue. Watch for more details coming soon. We will also be selling Inspiration Studio Pro 2014 software soon. Studio Pro 2014 is for Inspiration and Inspiration Vue users who want to take their design skills to an advanced level.
Pre-Order the Inspiration Vue March 10
Pre-orders will begin Monday March 10 at noon MST. At that time we will open pre-orders in the Pazzles online store. The pre-order option requires a $50 non-refundable deposit towards the purchase of your machine. This will hold your place in line and we will ship according to the order in which we receive your deposit. When pre-ordering, you will be asked to select either an outright purchase at $399.00 with two free months of Pazzles Craft Room, or a Craft Room subscription commitment of 24 months with $99 down, or a 12 month commitment with $199 down. A Craft Room membership is $19.95 a month. You will receive an email confirmation once you have paid the $50 deposit letting you know your machine is held. When the machines arrive in our warehouse we will notify you and send instructions to complete your purchase.
Those who are under a current subscription commitment may buy the Inspiration Vue outright, or wait until their current commitment is fulfilled before selecting the commitment option. We will not be combining new subscription commitments with the remaining months left on a previous commitment.
Wholesale and retail representatives should contact Camilla directly for details on pre-orders for resale. She can be reached at camillah@pazzles.com.
Craft Room Loyalty Special
Craft Room members are VIP’s at Pazzles. For a limited time Pazzles Craft Room Members will be able to purchase the machine outright at a 15% discount. Complete the pre-order process as described above and select the outright purchase option. Your 15% discount will be applied on your final purchase.
Warranty and Support
The Inspiration Vue comes with a 1 year non-transferable warranty on parts and labor and 1 year of free technical support. As always, Craft Room members get unlimited free technical support.
International Ordering
We are happy to ship overseas, however international shipping charges will apply. We estimate $100-$150 shipping depending on destination. Additional customs and duties fees may apply. We have distributors in Australia, Germany, and South Africa which can reduce the cost of shipping to you. Please see our International Store Locator page for contact information for these retailers.
Pre-Order Launch Party
Now that we’ve covered all the details, it’s time for the fun. Join us Monday March 10 at 9 am MST for a pre-order launch party as we countdown to purchase time. Join us in the member chat area for games, fun and prizes. Check the blog Monday morning for more details.
Friday, February 28, 2014
Tardis Bleach Resist Shirt
One of my daughter's BFFs was having a birthday and he is obsessed with Dr. Who. I made him this T-shirt using Pazzles vinyl and a bleach resist technique. I made two. One for my daughter and one for him. My daughter doesn't really watch Dr. Who but she wanted to walk into school with it on to see what his reaction would be before he knew he was getting one. It was a funny sight to see..lol
The teachers saw it and loved it. Next week is space week and each classroom was assigned a planet. Sooooo I will be using this technique to make each of them a t-shirt with their assigned planet on it. I think they are going to be cool.
Here are some loose directions...tee hee
First I found a Tardis image that I liked on line and traced it using my Pazzles Pro software.
Then I cut the Tardis out using permanent vinyl. I used transfer tape to transfer the cut out image to my shirt. I pressed it down really hard, to be sure it was stuck to the shirt. I even used a rolling pin to be sure I got all the edges. I peeled the transfer tape off and ran my finger firmly over the more detailed parts of the design, just to be sure.
I put the shirt on a platen so the bleach would not soak through to the back. A big piece of cardboard will work just as well.
Then I just sprayed it with a bleach cleaner. I know you can use a mixture of water and bleach but the bleach cleaner was handy and worked great. I used a misting bottle. You can get one at Walmart in the travel section. Then I used a larger sprayer to get larger drops so it looked like stars.
Don't get to close to the shirt when you are spraying the bleach. You don't want to soak it or the bleach will get under the vinyl. Also it takes a few mins for the bleach to take effect. At first it looks like nothing is happening then right before your very eyes you start seeing it work. I recommend that you spray several light coats and us a blow dryer between each coat. It worked great this way and I got some incredible details.
I originally tried it out on an old t-shirt using contact paper and it didn't seem to work as well as the vinyl. I don't think it was as sticky enough so it didn't get clean edges like I did when I used the vinyl.
** Bonus Hint...If you do get some bleeding under your vinyl you can use a black laundry marker to clean it up. Of course this only works if you are using a black shirt. But it helps if you get a little crazy with the bleach spraying...lol
Monday, February 24, 2014
Need For Speed Shadow Box
My son loved his little cars when he was younger. He always pretended the cars were driving really fast and the police pulled them over. He played with them almost every day, and we rarely left the house without at least one in his pocket. But this too shall pass…ho hum. We recently cleaned out his toy box and I found all his beloved cars at the very bottom. He was hesitant to get rid of them but he also said, “I don’t really play with them anymore”. So when I saw the Need 4 Speed Cutting Collection in the Pazzles Craft Room. I knew right away what I was going to do with it! I purchased a 12×12 shadow box, took the back off, laid it face down and filled it with his most favorite cars. I used vinyl to cut the files out, layering them as I went and applied it to the glass front of the shadow box. He was so happy and even got a little sentimental when I gave it to him. I hope it provokes those feelings every time he sees it.
Wednesday, February 12, 2014
Introducing The New Inspiration Vue
Woo Hoo! Its here! YIPEEE!!! The new Pazzles Vue! This baby has everything! Is this exciting or what?!
We’ve been keeping a little secret at Pazzles for several months. Actually it’s a pretty big secret, and we are thrilled that we can finally share!
Introducing…
We’ve combined everything you love about the original Inspiration with some sleek new upgrades. More details will be coming soon, but here are the main highlights of the Inspiration Vue™ :
Go to www.pazzles.net for more information!
We’ve been keeping a little secret at Pazzles for several months. Actually it’s a pretty big secret, and we are thrilled that we can finally share!
Introducing…
We’ve combined everything you love about the original Inspiration with some sleek new upgrades. More details will be coming soon, but here are the main highlights of the Inspiration Vue™ :
- Precision print and cut with new optical eye
- Slide out tray extension
- Shorter waiting time for large projects
- Tray tabs for improved mat feeding
- Mac compatible software
- Compatibility with existing Inspiration tools, mats and accessories
- New colors
- New lower price
Go to www.pazzles.net for more information!
Sunday, February 9, 2014
4th of July Card
Ok, I know its a little early but I was in the mood..tee hee. I cut everything out using my Pazzles Creative Cutter.
Chasin' the Clouds Away Card
Here is a card I made of course using my Pazzles Creative Cutter. The words are printed directly on the card.
Subscribe to:
Posts (Atom)